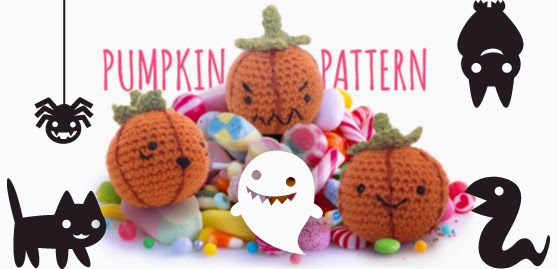
Great for Halloween, these cute, little, ghoulish gourds are quick and easy to make for seasonal gifts, toys or decorations. Stitch a different expression on each one to give them a personality! They can guard your trick or treat candy or hang in the window to scare passers by although you may hear more 'Awww' than 'Aghh' when people see them.
You will need
Stylecraft Special DK yarn
Stitch Marker
Yarn needle
Scissors
Stitches & Techniques
Magic Ring
ch - chain
dc - double crochet
dc2tog - dc two together
sl st - slip stitch
tr - treble crochet
htr - half treble crochet
picot - ch2, sl st in 2nd ch from hook
Pumpkin
With Spice
RND 1: 6dc into Magic Ring
RND 2: 2dc in each dc (12)
RND 3: dc in next dc, 2dc in next dc. (18)
RND 4: dc in next 2 dc, 2dc in next dc. (24)
RND 5: dc in next 3 dc, 2dc in next dc. (30)
RND 6: dc in next 4 dc, 2dc in next dc. (36)
RND 7-12: dc in each dc.
RND 13: dc in next 4 dc, dc2tog. (30)
RND 14: dc in each dc.
RND 15: dc in next 3 dc, dc2tog (24)
RND 16: dc in next 2 dc, dc2tog. (18)
RND 17: dc in next dc, dc2tog (12)
Add safety eyes about halfway down and 6 sc apart. Snap on washers and stuff firmly.
RND 18: dc2tog (6)
Fasten off leaving long tail.
Stalk
With Meadow
RND 1: 4dc into Magic Ring
RNDS 2-5: dc in each dc.
RND 6: 2dc in each dc. (8)
RND 7: 2dc in each dc. (16)
RND 8: *slst in next dc, (htr, tr, picot) in next dc, (tr, htr) in next dc, slst in next dc,* Repeat around to make 4 leaves.
Fasten off leaving a long tail.
Finishing
With Copper
Cut a long strand and use a running stitch or back stitch to create 6 lines down the pumpkin from the top opening to the centre of the bottom.
Stitch the mouth. using black embroidery thread or yarn. I used a tiny couching stitch to hold down the curve of the mouth.
Hide all the ends of your detailing yarn and thread inside the opening of the pumpkin with the stuffing, then using the long Spice tail, neatly sew the opening closed.
Position the stalk over the top of the pumpkin and using the long Meadow tail make a few firm stitches through the base of the stalk and the top of the pumkin and back. Repeat around to secure the stalk but still allow the leaves a little movement to create character. After you have tied off the last stitch, bring the thread through the body of the pumpkin and pull it a little tighter, then cut the yarn and it will be hidden inside.
You could place these little characters all over your home for halloween. Try different expressions for a bit more fun. If you have a collection of tiny pumpkins you could turn them into seasonal bunting using some ribbon or twine.
Please Note: As with all my free patterns, you can sell items you make using the pattern and you can share the pattern on your own blog or elsewhere as long as you link back to me. Please do not resell the pattern as your own work. That's when I get cross!


