Tuesday, 30 June 2015

Wedding decorations guest blog


I was asked because of my impending nuptials to write a guest post for the Stitch Craft Create blog. Let me tell you it was quite the cathartic outpouring of stress and I am grateful for the opportunity!

I am still slogging away with my various wedding makes and have hardly had time to write or even photograph them. There are a few snaps here and there on instagram and theres a treasure trove of ideas on my pinterest board but I have not been able to blog for ages and I just can't wait now to get married and let normal service resume!

Anyway for those of you getting married soon and looking for a bit of inspiration and reassurance that it is ok to do it yourself and have it your own way, head over to the Stitch Craft Create blog now for a few insights into the crazed mind of a soon-to-be-wed crafter!

DD x

Sunday, 10 May 2015

Bunting Stash Busting!


As many of you already know I am tying the knot in August so a lot of my time this year has been devoted to preparing for that. I now have my dress organised, catering booked, music sorted and a whole host of other bits are pulling together nicely but I have not spent much time on the pretty things which will give the event a bit of 'ahhhh' factor.

So I have started work on some fabric bunting using scraps of fabric from my stash and my trusty pinking shears!

My theme is hessian and lace - but with a colour injection! I am having bright, British Summertime flowers for my bouquet and the table decorations, and will carry the floral brights through to my little flower girl dresses (four floral print dresses of different colours), the cake, and the decor so that there is a colourful and happy theme to the day, without it all getting overly coordinated as that is just not me!

These floral triangles will be mixed up with some in rough hessian and others in lacy fabrics to create  my bunting.

When I worked out what size to make the triangles I did a bit of cutting to see what size of triangle I liked best and what would make the best of the fat quarters and scraps I had hanging around. I ended up with this template and I thought you may find it useful for creating that perfectly sized bunting triangle! Click on the image to get a free download of the template and print it out to use. 


There is a little twist to this tale. I'm on a shoestring budget for my event and will use every scrap of fabric I can find or recycle. Now I know there are incredibly worthy charities out there, my wedding not being one of them! So if you can put your fabric to better use for them I would much rather you did just that, but if you happen to have any fabric lying around of a floral or lacy variety and you would like to see it appear in my wedding bunting, not having any other use for it, I would love for you to send me an email or comment and I will let you have a postal address to send them to so that I can make them into flags! If you want to cut them to size to save weight and postage that is fine. I appreciate anything you can send.

I'm thinking that once it is done and I have used it I could pop a post on showing how it looks. That way if anyone has an event they could use it at down the line I could lend it out perhaps, paying it forward that way?! Just an idea really but there is something lovely about the idea of this happy bunting made from sad little fabric scraps which would never have had a chance at life otherwise!

One length of bunting I have been able to complete was made from crochet squares which I made ages ago, intending to cover a chair with them. I got rid of the chair rather than covering it so I had a rhino bucket full of squares! 


To bring the colourful squares into my theme I crocheted them into a chain of jute twine which I had picked up at yarndale a few years back. It worked a treat I think and here is the result! 


This is a small section of it strung out. I love the way the light shines through the colours! I ended up with just over 17 metres of bunting which sounds like a lot but won't amount to much in the face of the walls I need to cover! So time to destash the fabric!


Saturday, 28 February 2015

Hooked on Hearts // Wedding plans


I don't know about you lot, but for me, February has been absolutely chocca!

Amongst other things I've travelled around the country art directing photo shoots for work, designed a trade stand and attended the event to set up and style things, joined the gym, my new craft room furniture arrived and Darren put it together, more on that in another post - so excited to show you! Oh and we might have set our date for the Wedding, finally! 

We were determined it would be this year we tied the knot even though through various reasons and no small amount of procrastination, we didn't decide on when and where until earlier this month! So now, having set the date - 08.08.15 - we are in a mad panic to get everything sorted.


I have been designing my wedding invites this week in between everything else! (Sneak peek here.) Today, we went up to the hall we are using for the wedding after party and measured the spaces, checked what facilities there are etc. We will keep everything crossed for good weather so we can make use of the nice lawn outside. We want to have a hog roast and a bit of a knees-up afterwards and have found a great company who provide a mobile bar and disco! Plans abound so there will no doubt be more of this madness appearing on the blog before the summer.


So it was with feelings of love and romance in my heart and wedding bells on my mind that I approached the latest blog hop project with Stitch Craft Create. They showed me an advance copy of this great new book they have coming into stock for March - Hooked! By Michelle, Cécile and Sylvie Delprat. It is available for preorder now and with a free e-book to get you started while you wait for the print book to arrive!


It is full of clever little motif designs and really appeals to the designer and creator in me as the motifs become little building blocks for other ideas or decorations to add as patches to other creations. 


They can be made with any colours and by using a larger or smaller hook or yarn, the size range is great too. The patterns state quite small hook sizes and I think they are intended to use fine yarn such as sock yarn or cottons. I used my usual Double knit acrylic and a 4mm hook and got almost a coaster sized motif. I reckon with aran weight and a 5/6mm hook they would be big enough to use as such.


Of course, with all this talk of weddings and Valentine's day just done, I couldn't resist making the heart motifs in this candy pink. 


The instructions were succinct and easy to follow and I really liked the way the book was divided so that the 'gallery' of motifs was all together at the front, leaving the instructions at the back to find once the design had been chosen. It keeps the inspiration separate from the instruction and I like that.

There are some stitch explanations along with UK/US conversion tables so I think most beginners would be able to tackle this book, possibly with a little help from the masses of youtube videos out there for stitch tutorials etc.

If you are the sort of crocheter who likes to create your own look but is not ready to design your own patterns, this book is for you. Even if you are a designer it is such fun it would be hard to resist! The lovely guys at Stitch Craft Create are running a competition to win a copy of Hooked! Along with a crochet goodie bag so get involved! Details can be found here.

So anyway, back to the invitation designing now, I must get them out in the post otherwise nobody will turn up in August! Back as soon as possible with more on wedding ideas and a craft room update - just wait until you see it! 

Monday, 19 January 2015

Shades of Spring Cushion - Thrifty January Blog Hop

Honestly! If it wasn't for another blog hop whipping me into action I would never post on my blog at the moment! Life has been busy, there has been barely time to pick up a hook let alone write about it but the lovely team at Stitch Craft Create have asked me to join in with their Thrify January blog hop and so 'Boing!' here I go again!

The theme for the Stitch Craft Create digital magazine this month is Thriftiness and upcycling after the overspending and excesses of the festive period. I read some great articles and projects in there such as  knitted rug made from strips of fabric, updating a dress by adding a cute patch pocket from your fabric stash, a bag made from children's clothing and even one for us hooky types - a log cabin patchwork design cushion using those little bits and pieces of leftover yarn we can never bear to part with. I considered giving this one a go and embarked on a journey of discovery in my craft room in search for my leftover stash. Instead I found these...


I made this riot of crocheted squares last year for months and months. The idea had been to yarn-bomb a chair with them. I even began to attach them to the chair. The only problem was - and it took me a year to admit it - the chair was too big for my craft room. Eventually I came to terms with this and sold the chair. I have different plans now chair-wise so I am left with a huge carrier bag full of colourful crochet, asking to be made into something.

After careful consideration I have decided to join them together into a kaleidoscopic blanket for my spare room bed. It will really brighten the room up and I am sure the cat will appreciate a cosy new blanket on what he believes to be his bed!


So this week, as a test to see how the colours could blend in sections I created a smaller, cushion version from springtime yellows and blues. We are not quite there yet, the weather today is grey and cold and even the warm browns and golds are disappearing from the hedges leaving bare branches. My choice of colours are a reminder of the splendour to come with daffodils, bluebells and green buds on the branches along with those crisp, blue sky days where the air seems to smell fresher and it feels like everything will be ok.


It really felt great joining together those squares, finally using something I had put so much effort into so long ago! I slip stitched them together along the back in rows, then worked down the horizontals. This is absolutely my favourite way to join crochet but I am not keen on the seams it creates showing so for the blanket I will mattress stitch them (which I hate doing but prefer the look of - isn't that always the way?!) for the cushion it worked just fine as the back is hidden inside. I didn't even bother sewing in the ends, just hooked them through to the back and left them hidden. What a massive cheat I hear you say! I assure you had the cushion been destined as a gift or being kept as a permanent fixture I would have taken the time for washability purposes! As I plan on adding these sections into my blanket later on I left that work for another day.


To join the two sides together I started with a round of dc going through the stitch spaces. In the next round I put two trebles into every second dc space. And finally - the pompom edging! I have fallen in love with this technique and wish to share it with you all. As this tale is growing long I will post the pattern details separately.


So if you have a bunch of motifs from a UFO you can't quite bring yourself to grow to blanket proportions, make a cushion! You get that great feeling of success and with half the time!

Well that's it. There are a host of thrifty January posts coming along and the list of participating blogs can be found here. Next, it is the turn of Yarn Demon.

Happy New Year everyone and enjoy the rest of the hop. I will be back soon with the pompom edging for those of you who want to try it out.


Thursday, 27 November 2014

Christmas Decorations Blog Hop (FREE Gingerbread Man Crochet Pattern)


I was asked by the lovely folks at Stitch Craft Create to make a Christmas decoration for their Christmas Blog Hop.  There have been 25 posts so far in the run up to the festive season. Yesterday we had an insightful book interview by Nicole of Follow the White Bunny with the author of Handmade Scandinavian Christmas, Hege Barnholt. She even made some paper decorations from the book.


I think as usual that I got the wrong end of the stick about the theme of the blog hop, judging by all the posts so far. Everyone else seems to have picked a project from a book to make or written a review. There are projects from Handmade Scandinavian Christmas, Washi Tape Christmas and Crochet Christmas Baubles to name a few. It is highly like that I was supposed to follow suit but instead I went off on a tangent and made something new!

Whilst pondering the subject for my blog hop I had a day out with a friend and her little girl who spotted a stall with beautifully decorated gingerbread shapes. We took a while to choose our victims from amongst the ranks of gingerbread people and it was almost a shame to devour them, they were so pretty. I got over the feeling soon enough as the gingerbread was delicious! I decided that my decoration would be my own take on this delicacy.


Made as he is of crochet, there is little danger of this little guy being eaten by the cat while he hangs on my Christmas tree, which is just as well because he can’t run like his ancestor in the fairytale could! I intend to make him some friends too, decorating them in different ways to create a variety of personalities.

Gingerbread Man Pattern

You will need:
DK yarn in biscuit / brown
4mm crochet hook
yarn needle
buttons and yarn / thread to decorate
stuffing (only if you are making a cuddly toy version, mine is flat with no stuffing)

MR – Magic Ring
dc – Double Crochet
dc2tog – dc 2 together
ch – chain
FO – fasten off
chsp – chain space
sk – skip
st – stitch

Note: All parts are worked amigurumi style in a continuous spiral. Use a stitch marker to keep track of the end of each round to avoid pickles, swearing and unravelling!

Head
Rnd 1: 6dc into MR
Rnd 2: 2dc in each dc around (12dc)
Rnd 3: (dc in next dc, 2dc in next dc) around (18dc)
Rnd 4-7: dc in each dc around
Rnd 8: (dc in next dc, dc2tog) around (12dc)
Rnd 9: dc2tog around (6dc) FO.

Arms (make 2)
Rnd 1: 8dc into MR
Rnd 2-6: dc in each dc around
Rnd 7: dc in next 6 dc, dc2tog (7dc)
Rnd 8: dc in next 5 dc, dc2tog (6dc) FO.

Legs (make 2)
Rnd 1: 6dc into MR
Rnd 2: 2dc in each dc around (12dc)
Rnd 3-4: dc in each dc around
Rnd 5: dc2tog over next 8dc, dc in next dc around (8dc)
Rnd 6-8: dc in each dc around
Note: FO 1st arm but leave 2nd unfinished. You will continue the body from the top of this leg.

Body
Continuing on from 2nd leg. Rnd 1 will join the two legs together. You will dc around the top of each leg, joining together with a ch1 space between them.
Rnd 1: Dc in next 7dc, 1ch, place hook in the top of 1st leg, just after where you fastened off, dc in next 8dc, 1ch, dc in last st of 2nd leg. (16dc / 2 chsp)
Rnd 2: (sk 1ch, dc in next 8dc) around (16dc)
Rnd 3-6: dc in each dc around
Rnd 7: (dc in next 2 dc, dc2tog) around (12 dc)
Rnd 8: dc in each dc around
Rnd 9: dc in next 4 dc, (moving across to top of 1st arm) dc in next 6 dc, (moving back to body) dc in next 7dc, (moving across to top of 2nd arm) dc in next 6 dc, (moving back to body) dc in last dc. (24dc)
Rnd 10: (dc in next 2 dc, dc2tog) around (18dc)
Rnd 11: dc in next dc, dc2tog around (12dc)
Rnd 12: dc2tog around (6dc) FO leaving long tail.

Finishing      
You could stuff the gingerbread man if preferred and you could add safety eyes to the head before finishing off if you want it as a toy. I wanted mine to look more like a biscuit so I left it unstuffed and added stitching around the edges to keep it flat.

Sew in all loose ends not hidden during the stitching of the body. Sew head and body together at neck with long tail on body.


Personalising
Decorate your gingerbread with contrast yarn for ‘icing’ and buttons or beads for ‘jelly sweet buttons’. I gave my gingerbread a heart as well as buttons and used a blanket stitch around the edges as well as some couched stitches to create piping for cuffs and hems of his outfit. You could use any kind of embroidery technique you prefer for this. I would love to see how your gingerbread men turn out. 

Use this basic recipe to create all sorts of styles, you might even want to add hair or other decorations to create different characters.

Hanging loop
Sew a loop of ribbon or cord into the top of your gingerbread man, tie the ends and then poke the knot inside the crochet fabric to hide. You could do this before sewing up the head and body but if you forget that’s fine. (I did and mine worked out ok!)


Have fun making your decoration and enjoy the rest of the blog hop. The list of people taking part is here. Next up is the exceedingly talented Lauren of Guthrie andGhani. I can’t wait to read her post!

Friday, 7 November 2014

Christmas Makery

I made these for the Crochet Christmas Baubles book but had to send them away so it's back to the drawing board!


OMG! How did this happen?!!! I was going to be so prepared for Christmas this year, handmade gifts well under way and decorations done. That turned out to be an unrealistic dream and I have NOTHING done!

So the time has come to get things under control. I don't have too many things on my list but I certainly need to make sure that everything I make from here on in is a Christmas item. I plan on sticking to small things - nobody will be getting a blanket this year put it that way! I think some things like wrist warmers, mug cosies and that kind of thing would be good as gifts, and a few simple decorations to liven up the tree.

One thing which will help kick-start my Christmas creativity will be the blog hop I have been asked to join by Stitch Craft Create. I am to make a Christmas decoration and write about it. I have not decided what I will make yet but I imagine it could very well be crochet related! Whatever I make I will post some instructions in case you want to have a go at it yourselves. If all goes to plan my Christmas Blog Hop post should be live on 27th November and I will try to remember to link back from here.

Oh no! I just realised I need to make my Christmas cake too! Got my work cut out for me I think!

Last year's Christmas cake was lovely but all that decoration was hard work so I may scale back this time...


Hopefully you are all a little more organised with your gifts and decorations than me but if not, take comfort in the fact that I am in as much of a pickle as you are!

Happy last-minute-Christmas-crafting everyone!

Wednesday, 1 October 2014

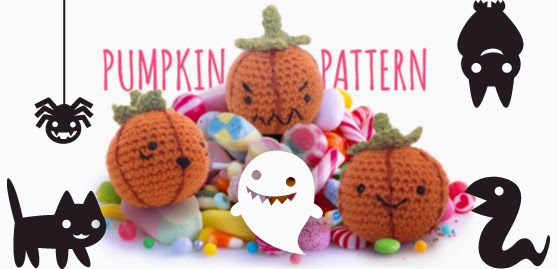
Crochet Amigurumi Pumpkin Pattern


Great for Halloween, these cute, little, ghoulish gourds are quick and easy to make for seasonal gifts, toys or decorations. Stitch a different expression on each one to give them a personality! They can guard your trick or treat candy or hang in the window to scare passers by although you may hear more 'Awww' than 'Aghh' when people see them.


You will need

Stylecraft Special DK yarn
Stitch Marker
Yarn needle
Scissors


Stitches & Techniques

Magic Ring
ch - chain
dc - double crochet
dc2tog - dc two together
sl st - slip stitch
tr - treble crochet
htr - half treble crochet
picot - ch2, sl st in 2nd ch from hook


Pumpkin

With Spice
RND 1: 6dc into Magic Ring
RND 2: 2dc in each dc (12)
RND 3: dc in next dc, 2dc in next dc. (18)
RND 4: dc in next 2 dc, 2dc in next dc. (24)
RND 5: dc in next 3 dc, 2dc in next dc. (30)
RND 6: dc in next 4 dc, 2dc in next dc. (36)
RND 7-12: dc in each dc.
RND 13: dc in next 4 dc, dc2tog. (30)
RND 14: dc in each dc.
RND 15: dc in next 3 dc, dc2tog (24)
RND 16: dc in next 2 dc, dc2tog. (18)
RND 17: dc in next dc, dc2tog (12)
Add safety eyes about halfway down and 6 sc apart. Snap on washers and stuff firmly.
RND 18: dc2tog (6)
Fasten off leaving long tail. 


Stalk

With Meadow
RND 1: 4dc into Magic Ring
RNDS 2-5: dc in each dc.
RND 6: 2dc in each dc. (8)
RND 7: 2dc in each dc. (16)
RND 8: *slst in next dc, (htr, tr, picot) in next dc, (tr, htr) in next dc, slst in next dc,* Repeat around to make 4 leaves.
Fasten off leaving a long tail.


Finishing

With Copper
Cut a long strand and use a running stitch or back stitch to create 6 lines down the pumpkin from the top opening to the centre of the bottom.

Stitch the mouth. using black embroidery thread or yarn. I used a tiny couching stitch to hold down the curve of the mouth.

Hide all the ends of your detailing yarn and thread inside the opening of the pumpkin with the stuffing, then using the long Spice tail, neatly sew the opening closed.

Position the stalk over the top of the pumpkin and using the long Meadow tail make a few firm stitches through the base of the stalk and the top of the pumkin and back. Repeat around to secure the stalk but still allow the leaves a little movement  to create  character. After you have tied off the last stitch, bring the thread through the body of the pumpkin and pull it a little tighter, then cut the yarn and it will be hidden inside.

You could place these little characters all over your home for halloween. Try different expressions for a bit more fun. If you have a collection of tiny pumpkins you could turn them into seasonal bunting using some ribbon or twine.


Please Note: As with all my free patterns, you can sell items you make using the pattern and you can share the pattern on your own blog or elsewhere as long as you link back to me. Please do not resell the pattern as your own work. That's when I get cross!

Monday, 1 September 2014

Cactus Amigurumi Pattern


I have been meaning to make a little crochet cactus for ages now and looking online I saw lots which people had made to look like the realistic plants. These are brilliant but I already have a healthy collection of cacti which look as realistic as they come! So I thought, what is better than a cactus? The answer came to me; 'A cactus with a face!' And so my pattern came to be.

This little amigurumi cactus will never need to be watered. No matter how much you neglect her she will continue to smile at you from her place on the shelf. She will never spike you (even if you sit on her!) and she will stay in flower all year round. As I am not known for my green fingers (hence the cacti collection) this is my ideal plant!

The pattern only calls for a few odds and ends of Double Knit (light worsted) yarn so it is great for using up your stash. It uses simple stitches and typical amigurumi techniques such as the magic ring and working in a spiral. You could use any colour combinations you like for the pot and the flower and will just need two shades of green for the cactus itself and a brown or neutral for the sand/soil at the top of the pot. The rest is up to you!

My cactus has safety eyes but you could use beads or buttons, or you could embroider the eyes with black thread. I used plastic toy pellets in the base of my pot for weight but you could use sand, small pebbles or dry rice instead.

I need to make some friends now for this one. She tried to make friends with the other cacti but they are just too spiky!

If you buy my pattern and have any questions please comment here or email me. I would be glad to help. If you make a cactus and want to send me a photo I would love to see it! I am on instagram so you could tag me there or just drop me an email. I hope you have as much fun as I did making her!

Sunday, 31 August 2014

Pumpkin Crochet Competition!


Hello everybody! I worked up this cute little pumpkin amigurumi crochet pattern for the guys at Stitch Craft Create to go out in their Autumn catalogue and I will pop all the instructions up here for those of you who don't receive their mailing, in time for you to hook up your own spooky cutie's for Halloween!

There's just this one thing...

... I would really like to get to 2000 followers on Instagram and I am a couple of hundred off so I thought it would be a nice way to pick up more followers if I ran this as a giveaway. I will therefore release the pattern when I reach my magic number. In addition to this I will send the three pumpkins shown in this photo to a lucky winner (drawn at random from all entries when I get to 2K followers). I hope you don't all think I'm being too mean making you wait!

So, to enter the competition you will need to:
Have an Instagram account (if you don't, get one! It is my fave ever social app - just wow!)
Be following @dottydoily
Be following @stitchcraftcreate
Re-gram the photo tagging @dottydoily and #ddpumpkinwin
When I get to 2k followers I will do the draw for the winner and launch the free pattern. Good luck everyone!

(A little note to private instagrammers. You will need to either comment on my original post so that I can follow you to see your entry, or send me a Direct message to take part.)

Thursday, 12 June 2014

How to tie a slip knot


"Let's start at the very beginning..." Maria was a sensible girl if you ask me. I thoroughly agree that it is a very good place to start! But rather than Do, Re, Mi, in Crochet we generally begin with a slip knot. There are other ways to start when you are working special kinds of crochet but for your granny squares, doilies and blankets, a slip knot is what you will need to get started.

Some of you will have no problem mastering this while others (like myself once upon a time) will have a bit more difficulty and end up with a knot that doesn't slip, or a slip that won't knot! I have photographed every stage I go through when creating a slip knot and hopefully it should give you a fool proof guide to that most important crochet fundamental! This is my first Crochet School instruction so if anyone reads this and finds it is not helping I am looking for feedback please!


STEP 1: Use the right hook for your yarn
Before you start to crochet make sure you have the right yarn for your project and the right hook for that yarn. Don't do as I did and pick up any old yarn and hook combo, then wonder why your granny square looks like a holey lettuce leaf! All yarns have a label which gives needle size information. Just switch this for your crochet hook.

Hook Size Charts
Yarn Weight Charts

STEP 2: Make a loop at the end
Now you are ready to start crocheting. Have your hook ready but for now just make a loop in the end of the yarn like I have here.

If it helps to start with, place it down like I have so you can compare with the photo. Sometimes it all looks a bit different when you hold it up in the air. That comes with practice and you will soon be wondering what all the fuss was about!


STEP 3: Pull up through the loop
Next, take the top strand (connected to the ball) and pull a loop up from under your first loop.

STEP 4: Insert the hook in the centre loop
Pop your hook under the new loop and over the old loop as shown.

STEP 5: Pull short end to tighten knot
Pull the short end of the yarn to tighten the base of the knot. Keep hold of the hook as you do so and the main loop (it is referred to as the working loop in patterns) will stay quite loose.
STEP 6: Pull long end to tighten onto hook
Pull the long end (connected to the ball) of the yarn whilst continuing to hold the hook and it will tighten the working loop onto the hook. You are all set and ready to begin crocheting!

Practice this several times to get used to it. If you have done it right you should be able to slip the knot off the hook, pull the short end and the whole thing will come undone so you can do it again.


I hope that you have found this post useful. If you are a beginner crocheter and want to ask my advice about anything hooky related please comment or email me and I will do my best to help. Think of my as your crochet Agony-Aunt - The one with the blue rinse and the Werthers Originals in her handbag!

Please feel free to use my tutorials to help in any way with your crochet projects. I am happy for you to share them, just make sure to link back to my site by way of acknowledgement.

Monday, 9 June 2014

Blog Hop


It's time for a blog hop! "And what might a blog hop be?" I hear you ask. It is a sort of digital trail of discovery - a great way for bloggers, and in this case creatives and makers, to expand their reading lists, find new inspirations and like minds, and generally have a great round of mutual back patting! 

This particular blog hop concerns makers, crafters, artists and creatives and these are just the sort of people who's blogs I love to discover. The idea is that each participant tags three more people so that the cycle continues endlessly one would hope, although that magic number has somewhat eluded me this week!


I was asked to take part in the hop by lovely lady Alice who wrote her blog hop post last week. Take a look back at hers and you can follow the trail back and forward from there too. I was so pleased to be asked and looking forward to writing my post. However, the last week has been a frantic flurry of emails and messaging to recruit my three other bloggers. And now, on the eve of my scheduled post I have had to admit defeat with just two bloggers at the end of my post. I hope this doesn't upset the equilibrium of the blogosphere! I will introduce you to them at the end of my post.

And now to the post itself. I was asked four questions which I will answer as best I can below and they should give you a bit of an insight into my process, such as it is!


1. What am I working on? 

While I am interested in all craft and am in awe of sewers and printers and knitters, it always comes back to crochet for me. Maybe one day I will pick up a needle and thread or try my hand at papercrafting but there is always something else to try - a new thickness of yarn, a new stitch, a different approach to working with colour or texture - so that crochet still holds me in thrall.


At present I am working on a mass of squares of all colours of the rainbow to cover an armchair I adopted and named 'Dorothy' and in whom I am sitting in whilst writing this post. The scale of the project is somewhat daunting so it is something I come back to every now and again in between other things. Maybe one day you will see a Ta-dah post with the culmination of my efforts showing Dorothy in her dazzling new coat of many colours!

By contrast I was asked this week to write a pattern for a little Pumpkin Amigurumi to be featured in a catalogue in September for Stitch Craft Create. I will also be posting it on my blog as it has been a while since I featured a free pattern. I worked it up yesterday afternoon and am thinking about making him some friends with different expressions on their faces now. Short and sweet!


A couple of months back I was asked to write a pattern for a great book about making accessories and decorations for your bike. The book is called Craft Bomb your Bike and is out in August but available to preorder now. Another of my patterns featured in 101 Ways to Stitch Craft Create Vintage earlier this year and I am pleased to say that both patterns were the featured projects on the front covers of their respective books!

My brain is always ticking away with new things to try and that small selection does not cover all my WIP's and UFO's such as a tapestry crochet cushion cover, a handbag and more, all hidden away in my drawer of doom! All will be resurrected at some point but I am a little excitable about new things and less so about finishing off old things!

2. How does my work differ from others of its genre? 

I would say that whilst individual aspects of my work fit in with other examples of their genre, the fact that I am never content with just one kind of crochet, one application, one colour palette or one source of inspiration keeps my work fresh. 


You wouldn't be able to visit my blog knowing exactly the sort of thing you are going there to see, apart from it being crochet related! In general I prefer bright colours but I have even been known to use more subdued colour palettes so there really is no tying me down! Whilst I am in awe of the makers who are able to churn out beautiful blanket or bootie sets one after another, I don't think that is something I will be able or willing to do anytime soon! 

3. Why do I write/create what I do? 

I have always enjoyed the creative process - I used to love drawing and making and creative writing as a child and apart from a short break while I was busy being a teenager and early twenty-something, I have continued this obsession into adulthood. Paintings and stories have become graphic design and blogging, clay modelling and straw dollies have become crochet and so on. I think it is safe to say that I will always want to make something and then tell the world about it!


4. How does your writing/creating process work?

Inspiration strikes from so many directions that it is hard to keep up with it! For example, I could start researching something for work then spot a reference to a new method or find an unusual colour palette on pinterest or instagram and then suddenly I am away, trying something out, writing it all down, photographing it and sharing it on instagram, and then when I have finished the item and am ready to proudly show it to the world, I will either write it up as a pattern or tutorial or just as a final reveal if I am feeling precious about it, and up it pops on the blog!

Time is a huge constraint for me however, I wish I could make and write full time but I work full time as an Art Editor for a craft publisher and online craft store (which is brilliant BTW!) and when I am home, even without children in my life I find that there is a lot of boring stuff taking up my time. I love that I stay busy - I would be bored without every minute spoken for in some way but it would be great to have a few hours a week I could devote to dottydoily. Maybe one day...

I will finish off by introducing my fellow blog hoppers:


Jijihook is a French blogger who designs crochet amigurumis. She shares free crochet patterns and all her creative ideas on her blog. Since she is also fond of granny squares and artjournal, she has launched two linky parties that anyone can join at any time: the Granny Love Challenge (the idea is to crochet at least one granny per week) and the "Artjournal et Gribouillages" Challenge (the idea is to make one page of artjournal on a different theme every week). She also has an Etsy shop with English crochet patterns and I love her instagram feed @loisirspassion_jijihook

Jennifer is a full time teacher and part time mum, wife, gardener and crochet geek (not necessarily in that order). She took up crochet two years ago when her youngest child left home for art school and has not been able to put her hook down since! She blogs refularly and can be followed on Twitter as @JennyHSkye

I hope you enjoy reading their posts which will be out next Monday 16th June.