Showing posts with label cute. Show all posts

Wednesday, 1 October 2014

Crochet Amigurumi Pumpkin Pattern


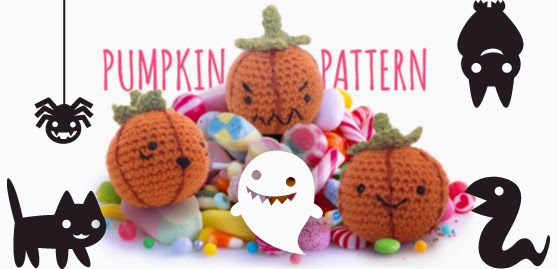
Great for Halloween, these cute, little, ghoulish gourds are quick and easy to make for seasonal gifts, toys or decorations. Stitch a different expression on each one to give them a personality! They can guard your trick or treat candy or hang in the window to scare passers by although you may hear more 'Awww' than 'Aghh' when people see them.


You will need

Stylecraft Special DK yarn
Stitch Marker
Yarn needle
Scissors


Stitches & Techniques

Magic Ring
ch - chain
dc - double crochet
dc2tog - dc two together
sl st - slip stitch
tr - treble crochet
htr - half treble crochet
picot - ch2, sl st in 2nd ch from hook


Pumpkin

With Spice
RND 1: 6dc into Magic Ring
RND 2: 2dc in each dc (12)
RND 3: dc in next dc, 2dc in next dc. (18)
RND 4: dc in next 2 dc, 2dc in next dc. (24)
RND 5: dc in next 3 dc, 2dc in next dc. (30)
RND 6: dc in next 4 dc, 2dc in next dc. (36)
RND 7-12: dc in each dc.
RND 13: dc in next 4 dc, dc2tog. (30)
RND 14: dc in each dc.
RND 15: dc in next 3 dc, dc2tog (24)
RND 16: dc in next 2 dc, dc2tog. (18)
RND 17: dc in next dc, dc2tog (12)
Add safety eyes about halfway down and 6 sc apart. Snap on washers and stuff firmly.
RND 18: dc2tog (6)
Fasten off leaving long tail. 


Stalk

With Meadow
RND 1: 4dc into Magic Ring
RNDS 2-5: dc in each dc.
RND 6: 2dc in each dc. (8)
RND 7: 2dc in each dc. (16)
RND 8: *slst in next dc, (htr, tr, picot) in next dc, (tr, htr) in next dc, slst in next dc,* Repeat around to make 4 leaves.
Fasten off leaving a long tail.


Finishing

With Copper
Cut a long strand and use a running stitch or back stitch to create 6 lines down the pumpkin from the top opening to the centre of the bottom.

Stitch the mouth. using black embroidery thread or yarn. I used a tiny couching stitch to hold down the curve of the mouth.

Hide all the ends of your detailing yarn and thread inside the opening of the pumpkin with the stuffing, then using the long Spice tail, neatly sew the opening closed.

Position the stalk over the top of the pumpkin and using the long Meadow tail make a few firm stitches through the base of the stalk and the top of the pumkin and back. Repeat around to secure the stalk but still allow the leaves a little movement  to create  character. After you have tied off the last stitch, bring the thread through the body of the pumpkin and pull it a little tighter, then cut the yarn and it will be hidden inside.

You could place these little characters all over your home for halloween. Try different expressions for a bit more fun. If you have a collection of tiny pumpkins you could turn them into seasonal bunting using some ribbon or twine.


Please Note: As with all my free patterns, you can sell items you make using the pattern and you can share the pattern on your own blog or elsewhere as long as you link back to me. Please do not resell the pattern as your own work. That's when I get cross!

Monday, 1 September 2014

Cactus Amigurumi Pattern


I have been meaning to make a little crochet cactus for ages now and looking online I saw lots which people had made to look like the realistic plants. These are brilliant but I already have a healthy collection of cacti which look as realistic as they come! So I thought, what is better than a cactus? The answer came to me; 'A cactus with a face!' And so my pattern came to be.

This little amigurumi cactus will never need to be watered. No matter how much you neglect her she will continue to smile at you from her place on the shelf. She will never spike you (even if you sit on her!) and she will stay in flower all year round. As I am not known for my green fingers (hence the cacti collection) this is my ideal plant!

The pattern only calls for a few odds and ends of Double Knit (light worsted) yarn so it is great for using up your stash. It uses simple stitches and typical amigurumi techniques such as the magic ring and working in a spiral. You could use any colour combinations you like for the pot and the flower and will just need two shades of green for the cactus itself and a brown or neutral for the sand/soil at the top of the pot. The rest is up to you!

My cactus has safety eyes but you could use beads or buttons, or you could embroider the eyes with black thread. I used plastic toy pellets in the base of my pot for weight but you could use sand, small pebbles or dry rice instead.

I need to make some friends now for this one. She tried to make friends with the other cacti but they are just too spiky!

If you buy my pattern and have any questions please comment here or email me. I would be glad to help. If you make a cactus and want to send me a photo I would love to see it! I am on instagram so you could tag me there or just drop me an email. I hope you have as much fun as I did making her!

Sunday, 31 August 2014

Pumpkin Crochet Competition!


Hello everybody! I worked up this cute little pumpkin amigurumi crochet pattern for the guys at Stitch Craft Create to go out in their Autumn catalogue and I will pop all the instructions up here for those of you who don't receive their mailing, in time for you to hook up your own spooky cutie's for Halloween!

There's just this one thing...

... I would really like to get to 2000 followers on Instagram and I am a couple of hundred off so I thought it would be a nice way to pick up more followers if I ran this as a giveaway. I will therefore release the pattern when I reach my magic number. In addition to this I will send the three pumpkins shown in this photo to a lucky winner (drawn at random from all entries when I get to 2K followers). I hope you don't all think I'm being too mean making you wait!

So, to enter the competition you will need to:
Have an Instagram account (if you don't, get one! It is my fave ever social app - just wow!)
Be following @dottydoily
Be following @stitchcraftcreate
Re-gram the photo tagging @dottydoily and #ddpumpkinwin
When I get to 2k followers I will do the draw for the winner and launch the free pattern. Good luck everyone!

(A little note to private instagrammers. You will need to either comment on my original post so that I can follow you to see your entry, or send me a Direct message to take part.)

Friday, 9 November 2012

What we've been up to - Instagram Version!

For those of you that don't follow us on Instagram, here's a preview of our latest pictures showing what we've been up to.

If you don't have a smart phone then you can still look at our photos from your computer as Instragram have now launched on the web too - Have a peek here


If you do have the Instagram app and want to follow us, our username is @twobirdscraft