Showing posts with label Beginner crochet. Show all posts

Wednesday, 1 October 2014

Crochet Amigurumi Pumpkin Pattern


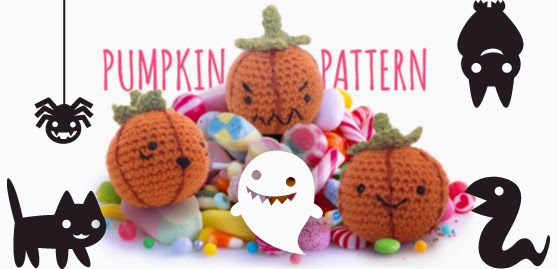
Great for Halloween, these cute, little, ghoulish gourds are quick and easy to make for seasonal gifts, toys or decorations. Stitch a different expression on each one to give them a personality! They can guard your trick or treat candy or hang in the window to scare passers by although you may hear more 'Awww' than 'Aghh' when people see them.


You will need

Stylecraft Special DK yarn
Stitch Marker
Yarn needle
Scissors


Stitches & Techniques

Magic Ring
ch - chain
dc - double crochet
dc2tog - dc two together
sl st - slip stitch
tr - treble crochet
htr - half treble crochet
picot - ch2, sl st in 2nd ch from hook


Pumpkin

With Spice
RND 1: 6dc into Magic Ring
RND 2: 2dc in each dc (12)
RND 3: dc in next dc, 2dc in next dc. (18)
RND 4: dc in next 2 dc, 2dc in next dc. (24)
RND 5: dc in next 3 dc, 2dc in next dc. (30)
RND 6: dc in next 4 dc, 2dc in next dc. (36)
RND 7-12: dc in each dc.
RND 13: dc in next 4 dc, dc2tog. (30)
RND 14: dc in each dc.
RND 15: dc in next 3 dc, dc2tog (24)
RND 16: dc in next 2 dc, dc2tog. (18)
RND 17: dc in next dc, dc2tog (12)
Add safety eyes about halfway down and 6 sc apart. Snap on washers and stuff firmly.
RND 18: dc2tog (6)
Fasten off leaving long tail. 


Stalk

With Meadow
RND 1: 4dc into Magic Ring
RNDS 2-5: dc in each dc.
RND 6: 2dc in each dc. (8)
RND 7: 2dc in each dc. (16)
RND 8: *slst in next dc, (htr, tr, picot) in next dc, (tr, htr) in next dc, slst in next dc,* Repeat around to make 4 leaves.
Fasten off leaving a long tail.


Finishing

With Copper
Cut a long strand and use a running stitch or back stitch to create 6 lines down the pumpkin from the top opening to the centre of the bottom.

Stitch the mouth. using black embroidery thread or yarn. I used a tiny couching stitch to hold down the curve of the mouth.

Hide all the ends of your detailing yarn and thread inside the opening of the pumpkin with the stuffing, then using the long Spice tail, neatly sew the opening closed.

Position the stalk over the top of the pumpkin and using the long Meadow tail make a few firm stitches through the base of the stalk and the top of the pumkin and back. Repeat around to secure the stalk but still allow the leaves a little movement  to create  character. After you have tied off the last stitch, bring the thread through the body of the pumpkin and pull it a little tighter, then cut the yarn and it will be hidden inside.

You could place these little characters all over your home for halloween. Try different expressions for a bit more fun. If you have a collection of tiny pumpkins you could turn them into seasonal bunting using some ribbon or twine.


Please Note: As with all my free patterns, you can sell items you make using the pattern and you can share the pattern on your own blog or elsewhere as long as you link back to me. Please do not resell the pattern as your own work. That's when I get cross!

Monday, 1 September 2014

Cactus Amigurumi Pattern


I have been meaning to make a little crochet cactus for ages now and looking online I saw lots which people had made to look like the realistic plants. These are brilliant but I already have a healthy collection of cacti which look as realistic as they come! So I thought, what is better than a cactus? The answer came to me; 'A cactus with a face!' And so my pattern came to be.

This little amigurumi cactus will never need to be watered. No matter how much you neglect her she will continue to smile at you from her place on the shelf. She will never spike you (even if you sit on her!) and she will stay in flower all year round. As I am not known for my green fingers (hence the cacti collection) this is my ideal plant!

The pattern only calls for a few odds and ends of Double Knit (light worsted) yarn so it is great for using up your stash. It uses simple stitches and typical amigurumi techniques such as the magic ring and working in a spiral. You could use any colour combinations you like for the pot and the flower and will just need two shades of green for the cactus itself and a brown or neutral for the sand/soil at the top of the pot. The rest is up to you!

My cactus has safety eyes but you could use beads or buttons, or you could embroider the eyes with black thread. I used plastic toy pellets in the base of my pot for weight but you could use sand, small pebbles or dry rice instead.

I need to make some friends now for this one. She tried to make friends with the other cacti but they are just too spiky!

If you buy my pattern and have any questions please comment here or email me. I would be glad to help. If you make a cactus and want to send me a photo I would love to see it! I am on instagram so you could tag me there or just drop me an email. I hope you have as much fun as I did making her!

Sunday, 1 June 2014

Beginner Crochet


This area is strictly for newbie crocheters looking to pick up a hook for the first time or those who know the basics and want to add some new stitches to their repertoire. I aim to build a library of photo tutorials and possibly video instructions (if I work out how to set up the tech), working through from that first slip knot and endless string of chains (which you will not be able to stop making once it clicks!) to all the usual stitch suspects and the different ways of working crochet. I will add in some information about yarn weights and hook sizes along with anything else I can think of that I had to go and hunt down somewhere on the internet when I was a beginner crocheter.

There is a TON of information available to anyone learning to crochet these days, with youtube videos and blog tutorials aplenty, there is hardly cause for me to reinvent the wheel here! And yet I feel the urge to give something back.


Here are some of the great blogs and resources I found inspiration and instructions from when I started out crocheting...

Attic24 - My first project was Lucy's Summer Garden Granny Square

Crochet Geek - All kinds of crochet tutorials with clear instructions

the Purl Bee - Great patterns and tutorials for crochet and more

Annaboos House - Cute, quirky and original patterns with clear photos and instructions


I started my crochet journey with a video here and a tutorial there, all available for free thanks to the hours of time given up by crochet guru's the world over who have blogged and recorded all their tips and tricks to help me and many others get to grips with a new craft. However, I Googled and Pinterested my way around the web to find each piece of relevant information I needed in a way which suited my style of learning so my hope is to create a cohesive source for beginners, free of charge and easily accessible right here on my blog, to save all that searching. I will include links to other brilliant bloggers and free patterns which I benefitted from in my early days as well as my own content, because part of the fun of learning is reading about different methods and tips which will vary between people.

Your comments are always invaluable to me - if I start putting stuff out here and it isn't helping at all - let me know! Or if you are just confused by one step or your work isn't turning out the same as the picture I show, get in touch! I will try to answer your questions as quickly as possible. It will take a while for me to build up this collection of information so bear with me and please ask if you are looking for a tutorial I haven't written yet - I will point you in the right direction if I can.